
Published: 8th November 2011 | © Anthias Consulting Ltd
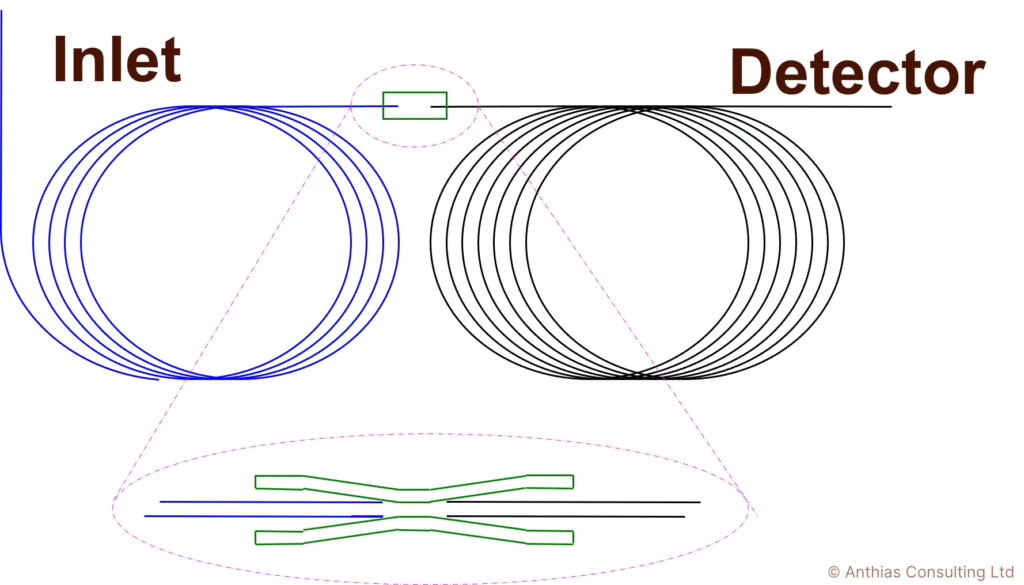
When connecting two GC capillary columns together (Figure 1), which could be any combination of a pre-column, guard-column, particle trap, restrictor and an analytical column, there are three main considerations:
- There is no leak.
- A leak out would lead to a loss of sensitivity (an extra split) and could produce changes in flow rate resulting in shifting retention times.
- A leak in
- Before the analytical column would cause damage (oxidation) of the stationary phase leading to high bleed and lower sensitivity.
- Would produce lower sensitivity (higher background) in mass spectrometers and other detectors with a vacuum or that are sensitive to air, for example an electron capture detector (ECD).
- There are no dead volumes.
- A dead volume would lead to band broadening resulting in a loss of resolution and sensitivity.
- There is no thermal lag.
- A thermal lag would result in a hot spot or cold spot, which could lead to one or multiple problems including tailing peaks, band-broadening, shifting retention times or thermal degradation.
There are many different types of column connectors, which try to make it easier to produce a leak-free connection. Many of these are metal, producing more of a thermal lag, then to combat this they are made smaller which makes them more fiddly and more likely to produce a leak or dead volume. In my experience, deactivated glass press-fit connectors are still the best in terms of low thermal lag and no dead volume but making sure that they are leak-free can be a little more difficult, especially when connecting a wider internal diameter (i.d.) column to a narrower i.d. column as there is a lot of back-pressure from the second column.
My tips for ensuring a leak-free connection are:

- Install the first column into the inlet and either keep turned off (always for hydrogen) or use a low carrier gas pressure that maintains a low flow (~0.4 mL/min) through the column.
- Trim the other end of the column cleanly and squarely (inspect with a magnifying glass) otherwise you will get a leak, use a diamond capillary column cutter if needed.
- Insert the end of the column into a small vial of methanol. If the carrier gas is turned on check for bubbles to indicate column flow. Leave in the methanol for 30 seconds to clean the end of the column and allow the polyimide to slightly swell.
- When you remove the end of the column from the methanol, immediately insert it firmly into the press-fit connector. Wearing a nitrile or latex glove will help get a good grip on the column so that you can push it in fully, you may be able to see a ring where the end of the column is sealing against the inside of the press-fit (Figure 2).
- If you remove the column you should start again with a new press-fit, as the inside may have been scratched which would lead to a leak. Repeat the column trimming and methanol steps for the new one.
- Repeat the process for the front end of the second column then install it into the detector or device.
- If the carrier gas isn’t on, turn it on next with a low flow and check that all connections, including both sides of the press-fit connector, are leak-free.
- Gradually increase the GC oven temperature at 10°C/min to approximately 200°C (check this is within the column limits). This will soften the polyimide coating at the column ends, causing the polyimide to flow and then bake to seal against the connector.
- If this step is done at a normal carrier gas pressure, sometimes the pressure combined with the softened polyimide pushes the column end from the connector causing a leak.
- Leave for approximately 30 minutes; cool the oven and leak-check the connection again. If leak-free, restore full operating pressure/flow to the column, leak check again, then use.
If you are installing a press-fit from a wide to a narrow i.d. columns, are using high pressures and are struggling to get a leak-free connection then a small bottle of polyimide resin can help. After soaking in methanol but before pushing the column into the press-fit, coat a little polyimide onto the column near (but not over) the end of column. When you firmly push the column into the press-fit it should then come into contact with the press-fit, then when you heat the oven it will cure the polyimide, creating a stronger seal. The polyimide resin can be particularly useful when connecting two columns for GCxGC with a thermal modulator.
To learn more about GC columns, attend:
- Practical Essentials of GC columns, detector and mass spectrometers, day 2 and Practical Essentials of GC columns, module four of our Complete GC and GC-MS
- Hands-on GC theory and methods , day one of our Hands-on GC and GC-MS
- Comprehensive GC hardware (Agilent GC)
- Comprehensive GC hardware (Shimadzu GC)
- Comprehensive GC hardware (Thermo GC)
- Comprehensive GC hardware (Scion/Bruker/Varian GC)
To learn how to trim a column and install a column attend:
- Absolute Basics of GC and GC-MS – learn to trim only
- Applied GC and GC-MS maintenance, module elven of our Complete GC and GC-MS
- Hands-on GC maintenance, day two of our Hands-on GC and GC-MS
Don’t forget that you can also subscribe to our newsletters and receive useful tips straight to your inbox!


