
Published: 29th October 2012 | © Anthias Consulting Ltd
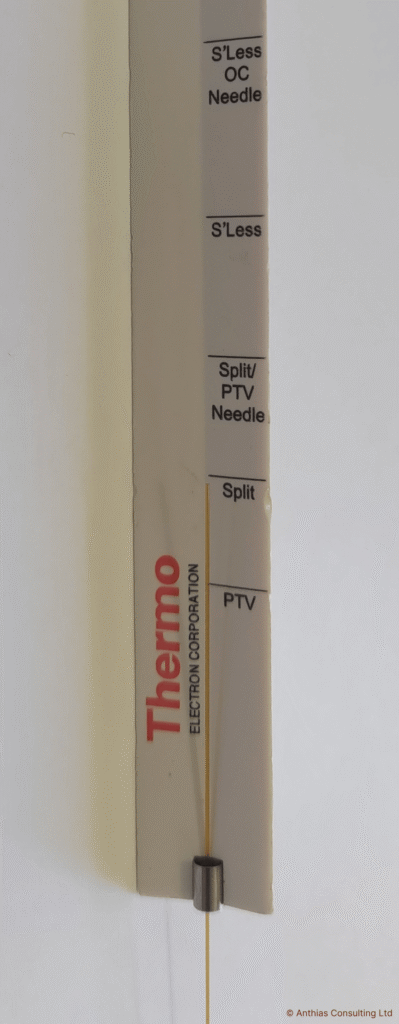
The installation of a capillary column into a gas chromatograph requires precise positioning of the column into both the inlet and the detector to obtain optimum analytical performance. Individual manufacturers, even different detector or inlet types or inlet liners, have different requirements for the optimum insertion length and positioning of the column, which should be checked from the relevant instrument operating manual. Here we look at installation using custom tools for column positioning.
Use of a custom tool to set the insertion distance
Some instrument manufacturers provide an optional tool (Figure 1) so that the tool, sometimes called a jig, acts as a surrogate inlet/detector, allowing the ferrule to be positioned and tightened onto the column before installation in the GC. Some tools have a graduated scale on the blade of the tool indicating the position to trim the column for the required insertion length and one tool has indicators for different inlets and/or detectors. Other manufacturers might have a different tool for each inlet and detector and the column may need to be trimmed to be flush with the end of the tool.
The first part of column installation is the same as described in TechTip 9, placing the column nut and ferrule onto the column before inserting into the tool. Column trimming may be performed before positioning and then tightening of the nut or, could be performed after tightening the nut to make the column flush with the end of the tool, each tool or jig has different instructions including those using SilTite® nuts and ferrules, therefore follow them. After assembly and trimming, the column nut is carefully removed from the tool and then inserted into the instrument. As the ferrule has already been locked onto the column at the correct length, the column will not slide as easily through the ferrule/nut during insertion, making this step of installation much easier.
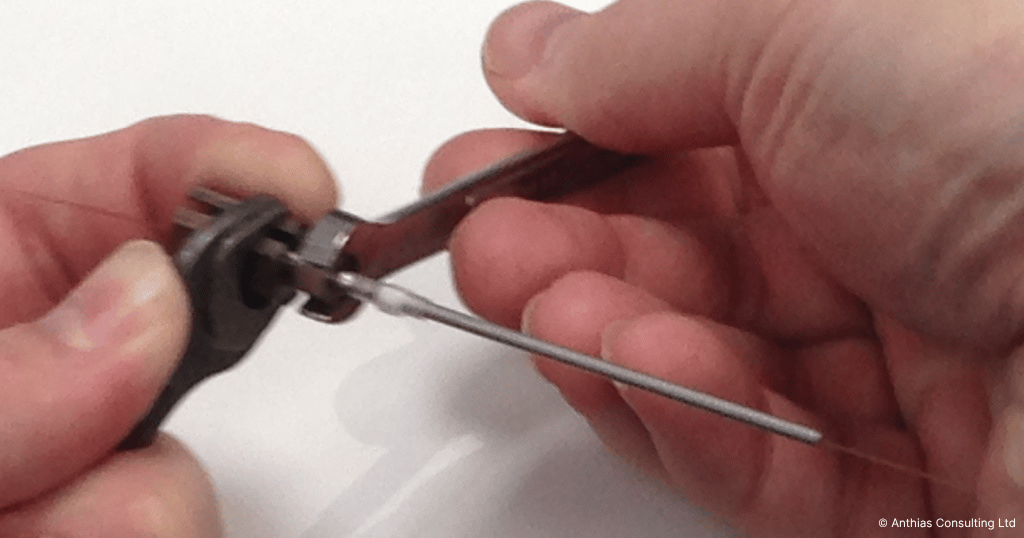
The disadvantages of using a tool or jig to position the column is that it isn’t fixed in place, unlike the base of an inlet or detector, to tighten the ferrule into position. Often, two wrenches are required, one to hold the tool, while the other tightens the nut (Figure 2) therefore care that the column doesn’t move during this step is needed. If a graphitised vespel ferrule or a SilTite® metal ferrule is used then slightly more force will be required which could lead to movement of the column or if a wrench slips, tugging of the column.
How tight?
Whichever technique is used for column installation, care most always be taken to
- Not overtighten the nut and squash the ferrule, this can lead to the ferrule being damaged, for example compacting and distortion of graphite ferrules leading to leaks. Damage might even occur to the column itself, for example with SilTite® metal ferrules that bind into the polyimide on the outside of the column, again leading to leaks.
- Ensure the nut is tight enough, otherwise the column position might move and there will be leaks. Some ferrules, for example 15% graphite and 85% vespel ferrules are much harder and after heating the column the nut must be further tightened.
To learn more about GC columns, attend:
- Practical Essentials of GC columns, detector and mass spectrometers, day 2 and Practical Essentials of GC columns, module four of our Complete GC and GC-MS
- Hands-on GC theory and methods , day one of our Hands-on GC and GC-MS
- Comprehensive GC hardware (Agilent GC)
- Comprehensive GC hardware (Shimadzu GC)
- Comprehensive GC hardware (Thermo GC)
- Comprehensive GC hardware (Scion/Bruker/Varian GC)
To learn how to trim a column and install a column attend:
- Absolute Basics of GC and GC-MS – learn to trim only
- Applied GC and GC-MS maintenance, module elven of our Complete GC and GC-MS
- Hands-on GC maintenance, day two of our Hands-on GC and GC-MS
Don’t forget that you can also subscribe to our newsletters and receive useful tips straight to your inbox!


