Submitted by anthias on
The installation of a capillary column into a modern gas chromatograph requires precise positioning of the column into both the inlet/injection port and the detector to obtain optimum analytical performance. Individual manufacturers have different requirements for the optimum insertion length and positioning of the column which should be checked from the relevant instrument operating manual.
Using septum or card to mark the correct insertion distance
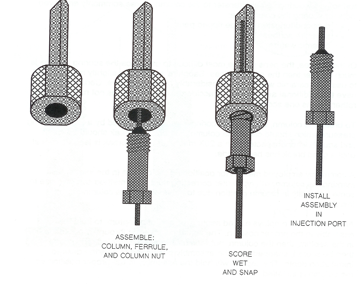
A used septum is slid onto the capillary column, or short length of thin card (approx 1cm x 4cm) is folded around the column and held in place with a paper clip. (The card protects the column from being scratched by the paper clip); followed by the column nut and the locking ferrule (see image below). After all the components have been assembled, a short length of column, ca 1 cm, is cut off to remove the possibility of blockage in the end of the column from septum and ferrule material.
The position of the septum/card is adjusted so that when the nut is resting on the septum/card, the correct length of column protrudes through the ferrule for insertion into the injector/detector. The column is then held under the septum, or by the card, and the column inserted into the injection/detector port, the column nut is then tightened to lock the ferrule onto the column and seal the connection. It is essential to hold the septum/card firmly against the bottom of the capillary nut whilst tightening it to set the correct distance, as the column can freely slide through the ferrule until tightened. After tightening the column nut, the paper clip and card can be removed from the column before ramping the oven temperature. The septum type should be chosen so that it can tolerate the upper limit of the oven temperature programme, and may then be left in place after installation quite safely.

NB some manufacturers specify the length of column as the distance measured from the back of the column nut.
Note:
An approach often used is to mark the correct insertion distance on the capillary column using typing correction fluid. The disadvantage of this approach is that as the fluid dries in the oven, fine white particles may flake off and contaminate the instrument. This is could be a serious problem if used on the transfer line of a GC-MS for instance where the particles could be drawn into the ion source. For this reason we would not recommend the use of correction fluid for the installation of capillary columns.
To learn more about GC & GC-MS troubleshooting, attend Day 2 of our Complete GC & GC-MS course and Module 4 of our Virtual Classroom Complete GC & GC-MS course.
Don't forget that you can also subscribe to our newsletters and receive useful tips straight to your inbox!
